Mission: To recomission this rather sad S-type into an excellent car in the fashion of Open
Skies Racing. This will include uprated suspension, 4.2 litre engine, power steering and a
special interior.
Now, due to popular demand, with NEW and IMPROVED image browsing!
More bondo! And scuttlevent fixed! (31.01.2008)
The first update of the year sees our "hero" developing a serious developed upper body, and
permanently embedded bondo dust. At least bondo is cheap, and it keeps me out of trouble!
Bondotastic! (17.12.2007)
Bondo, sanding, bondo, sanding, bondo, sanding, bondo, sanding, bondo, sanding, bondo, sanding, bondo, sanding, bondo, sanding, bondo, sanding, bondo, sanding, bondo, sanding, bondo, sanding, bondo, sanding, bondo, sanding, bondo, sanding, bondo, sanding! And finally it looks like I'm getting somewhere!
Big ole update - bodywork underway! (27.11.2007)
Hah, I'm still here! All my faithfull readers (Hi Chris, Andrew, Justin, Jeff, and hi Mum!) have
been begging for more photos of crusty old Jag parts, and my valiant if lacking attempts at kicking some life back into them.
The radiator is in! (09.05.2007)
Just a very brief update, basically to say the radiator/header tank issue has been solved. Phew! I had to refit the bonnet to check clearances. Not a very easy task to do single-handed (it's a good thing I haven't started body prep). Other things that have been finished since last update? The engine has oil, the power steering is hooked up and has oil, the brakes and clutch are ready for bleeding, some of the electrics have been reconnected.
So, pretty much ready to start it up, eh? Best iron my Barry Spline best wrenching apparel.
Time to catch up a bit (29.04.2007)
Well, though you may be thinking "Nick has gone soft, he's obviously put things away for the summer", that hasn't been the case. I've been beavering away every single day! Mostly just little stuff that hasn't merited posting an update (as if any of this stuff does...). The brake lines are done, fuel lines done, exhaust system fitted, cooleant (almost) done. And the engine is in place. Not the engine I had intended to fit though. Turned out that had a problem with clashing valves, but as luck would have it, a friend had a complete Series 3 4.2 going spare. This set me back a week, while I overhauled (read: cleaned and painted) the new engine and moved all the stuff over. It's all in place now though, and ... 2 days away from being fired up. I can't say from which point in time the 2 days are to be calculated from though, as I've been saying much the same for the past 4 weeks.
Once the engine fires though, the plan is pretty much as follows: Repair the doors, fit doors, prep bodywork for paint and make new interior. Sounds pretty easy, right? Just a matter of using plenty of Time, and lots more Money (which is more of a problem than time).
And we forge on... (04.03.2007)
This update takes us through the stripping of the inside floor (long, unpleasant and dull job). All the bitumen was removed from floors, sills, seats, seat back and rear shelf. A lot of it was brittle and easily chipped off, but quite a bit of it was soft and time consuming to remove. No solvents were used, only pure dogged persistance.
Most of the brakes have been hooked up as well, which meant taking the IRS off again. The brake lines could have been done easily in situ, but when I put the IRS together, I was sill in RHD mode, hence the handbrake calipers had to be take off, apart and reconfigured to work with the cable coming in from the left hand side of the car.
I've also modified the front seat mounts to allow the XJ40 seats to be fitted. A bit of head scratching and trial and error, but version 3 appears to work as planned.
The final biggish job was to get the fuel tanks back into place. Remarkably these were entirely free of rust inside, but the straps and fittings for holding them in place were too far gone. Using the principle of the original fittings, I made new straps from galvanized steel straps (with a triple layer of bicycle inner tube to prevent rubbing), welded in new slits for them to hook into, and voila! it doesn't look too bad. And didn't cost me a penny, as the metal was left over from when we built the workshop. Nice.
Looking ahead, more brake work, vacuum lines (a bit of a nightmare) and a new fuel line from rear to front (had hoped to not replace this, untill I noticed it was flattened where it enters the engine bay).
Getting even closer to the end of the body welding (21.01.2007)
This update sees the second half of the face replaced, together with the crossbeam and bumper mount. Had a fair amount of trouble getting the Burdospeed face to fit, but think it turned out ok in the end. Also found the area between the two front halves to be in very poor condition, so replaced most of that. Luckily I had a replacement for the panel that goes along the underside, and the rest was easily fabricated.
Just a couple of small things to finish now, and then it's on to the doors!
Getting closer to the end... of the welding. (16.01.2007)
This update sees the finishing off of the rear arch, the repair of the rear valance, some so-so patches to the front arch, and the start of the second face replacement. The rear arch came off almost as well as I'd hoped, and certainly better than the arch on the other side. The rear valance was more work than expected, but again a better and quicker job than the other side. The second face part was previously repaired by the PO, by buliding up most of it in fibreglass bondo. Apart from the problem of getting the contours just right, it wasn't too pretty. The crossbeam had also been repaired previously, but it's a quick job to do it again, properly, so I'm doing that as well.
Just a curiousity, but I posted an update exactly a year ago today. Wonder where I was in the project then?
In expectation of sunnier days (08.01.2007)
A while back I bought a secondhand Webasto sunroof through eBay. Today I had a proper look at it for the first time. The first thing that struck me was: Wow... this is way smaller than I thought it would be. And will all these parts really a sunroof make? I may have to look into buying a brand new one after all.
The first report of the New Year (07.01.07)
Well, since the last update I've been on the couch for a week with the 'flu, which really
slowed down progress. Lost a few good days of time I could have used to bring the project
even further forward. This means that since the last update, I've really only had 2 days
to spend in the workshop, but progress has been made! The rear of the front arch is now
closed, and just needs a little spot welding on the inside of the edge. The rear arch
conversion is almost completed, again just some spot welding to finish it up. This arch
came out much better than the first, both cosmetically and structurally. Almost makes me
want to go back and redo almost all the work I did last year (note: almost, I want this car
on the road this summer!). Nest up will be the rear valance. This isn't as bad as the one
on the other side, but it's still pretty bad. Reckon it will take an evening or two to have
it done. Also need to do the lower arch areas, where I basically have nothing but the
freestyle work I did on the other side to go by. After that it will be back to the front
arch for some repair bits, then it's facecutting time again!
Ye Olde Yuletide photo set (29.12.2006)
Two days on from the previous update and the sill is finishing (well, not entirely,
but i'll grind down the last welds tomorrow morning). The inner sill has a fresh new
edge, while the middle sill (stiffener might be the proper term) has been changed
(using the rest of the inner sill, as per the other side), and finally the outer sill
has been refitted, and fastened properly. Previously it hadn't been welded along the
lower edge, probably due to there not really beeing much of a lower edge to weld it
onto. Some fabrication and replacement had to be done at the bottom of the front door
post. The existing metal there was, well, non-existant. Next up is the front wheel arch,
starting with the lower rear of it. Luckily I have a repair panel for it (but I must be
careful not to use more than I need of it, as the leftovers are to be used for the
rear arch conversion).
Yet another photo set (27.12.2006)
Finally I think I can say I'm halfway with the welding... Today saw a final bit
of touch-up on the passenger side, and then I set the car down on 4 wheels and
fitted the tilter to tilt it the other way. This involved moving the car half a metre
sideways, so it was a good thing the steering is fitted and functional. Once the
tilter was in place, I removed the two remaining doors and started digging. I had
hopes that this side would be less work, as the previous owner did start repairing
the car about 23 years ago. He had fixed the rear wheel well and fitted a new sill.
The wheel well looks ok, and will save me time (it's a total bugger to fix), but
the sill wasn't looking too happy. It was only welded on on the upper side, with the
lower side held in place with just a couple of spots. So I cut it off again. This
showed that the middle sill had also had repairs and wasn't looking too nice. So I
cut that off as well. The inner sill doesn't look too bad, but I'll repair it in the
samme way I did the other side. At least I'll know it's fairly neat and strong. I expect to
be able to forge ahead with this side a lot quicker than the other one, as I now have a
lot more experience and have solved most of the little puzzles.
Eleventh photo set (19.12.2006)
Finally some fresh progress has been made. After months of building up the required
gumption, I finally cut half the face off the car. Quite terrifying really, as any
major mistakes would be very very hard to rectify. In the end though, I just did it,
and it went pretty well. Just a bit more welding to do, including welding the crows
feet (foot?) in place, and I'm officially halfway in the welding. If you don't count
the repairs to the doors... One door is pretty much ok, one is really very poor indeed,
and the remaining two are in need of work, but not too bad. The second half of the
welding should move ahead a bit faster, as the PO had already done a few repairs (way
back in 1983), plus now I won't have quite as much headscratching to do. Some of the
old repairs I'll be redoing though.
Tenth photos (13.12.2006)
After a period of summerly inactivity and time spent working on other stuff, I'm now
back to working on the S-type. As circumstances have it, I'm currently without a digital
camera, so to entertain my sole reader, I've dug out some older unshown photos. Theres
a few from when I did a wedding in my friends new 1970 XJ6 this summer. This is a car I
helped him find, and it took a year for the right one to appear. And it's a cracker! The
other photos show the rear valance before and after "making good". The rear valance had
probably the best paint on the entire car, but was of course one massive, inch-thick piece
of bondo. Also a couple of photos showing the "finished" arch and side valance. Current work
is replacing the "face" of the car, including the front crossmember and crows feet.
Ninth photos (08.05.2006)
The ninth set of photos. This is all about recreating the rear side valance. It was totally
eaten up by rust, inside and out, so I had to make a guess as to how it should be. An angled
strip was bent into shape for the lower edge, then the inside was cut away, from the inside
(unpleasant job), only to find that it would be hellish to weld from the inside, so the outside
was cut away as well. Through a combination of impatience, poor welding skills and ... well,
lacklustre gumption, the result is as follows. Instead of one large outer panel, I found it
easier to make 10 strips. With some grinding of welds and a skim of filler, it should be good
as new!
Eight photos (16.04.2006)
The eigth set of photos. The inner rear arch has now been built up to match the outer arch. And
work has started on the truly incredibly crusty rear valance/fuel tank area. This bit is going
to take some quite tricky fabrication.
Seventh photos (13.04.2006)
The seventh set of photos. The front wheelarch rear section is now welded in. Not as nice a
job as I had hoped (this goes for pretty much everything I do). Still needs the final closing
section, but it's a bastard of a piece to make, so it's not quite done yet. The rear arch has
now been cut to create the round rear arch a.k.a. "the rear wheel reveal".
Sixth photos (02.04.2006)
The sixth set of photos. The first sill is now closed. Working forward, the front wheelarch
is being repaired. Lots of tricky closing plates to be made up. The lower rear secion of
the front arch is especially tricky to do. Once the front arch is done an even trickier
section is the "face" of the car to be replaced. At the same time, I'm working towards
the rear, patching the numerous holes in the rear wheel well. This will be followed by
cutting out the rear wheel arch and creating a round wheel arch, in the style of the Mk2.
This is commonly referred to as a rear wheel reveal, and does wonders for the looks of
the S-type.
Fifth photos (23.03.2006)
The fifth set of photos. The first sill is almost ready to be closed. The inner sill
has been partially replaced, the middle sill has been replaced, using the remainder
of the inner sill. The rear jacking point is welded in, and the front one just needs
the welding. The power steering conversion has had the final fitting and just needs
to be hooked up to the pump. After the outer sill has been replaced, work will commence
on the front and rear arches, as we work our way round the car. Plenty of rust to cut and
replace! Also shown is the new face that will be welded in. This is a performance variant
supplied by the hot wrenches at Burdospeed way over in Connecticut. Rock on!
Fourth photos (01.02.2006)
The fourth set of photos. Work is well underway. The engine bay gutted and painted.
The shell has been stripped of paint and serious bodywork is about to be started.
Third photos (16.01.2006)
The third set of photos. Work has now commenced and is well underway. The frozen
engine has been removed, the engine bay gutted and painted. The front and rear
suspensions have been fitted.
Second photos (26.02.2005)
The second set of photos, taken after the car was moved into the workshop. Condition
is now judged to be a bit worse than hoped for. More rust than first seen, and the
engine is frozen solid.
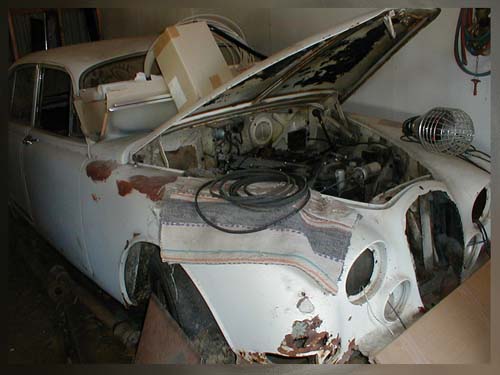
First photos (31.08.2004)
The first photos, taken in situ. The car had not run since 1982 and apart from some
restoration work done in 1983, has been pretty much left for over 20 years. Initially
the condition was judged to be better than it looked...
As a side project, the car is being converted from RHD manual steering to LHD
power steering. I'm using the steering rack and power steering pump from a S1 XJ6,
with a special mounting bracket. With experience of the light steering of the XJ6
it is planned to make the pressue in the power steering adjustable.
Some notes on this
|